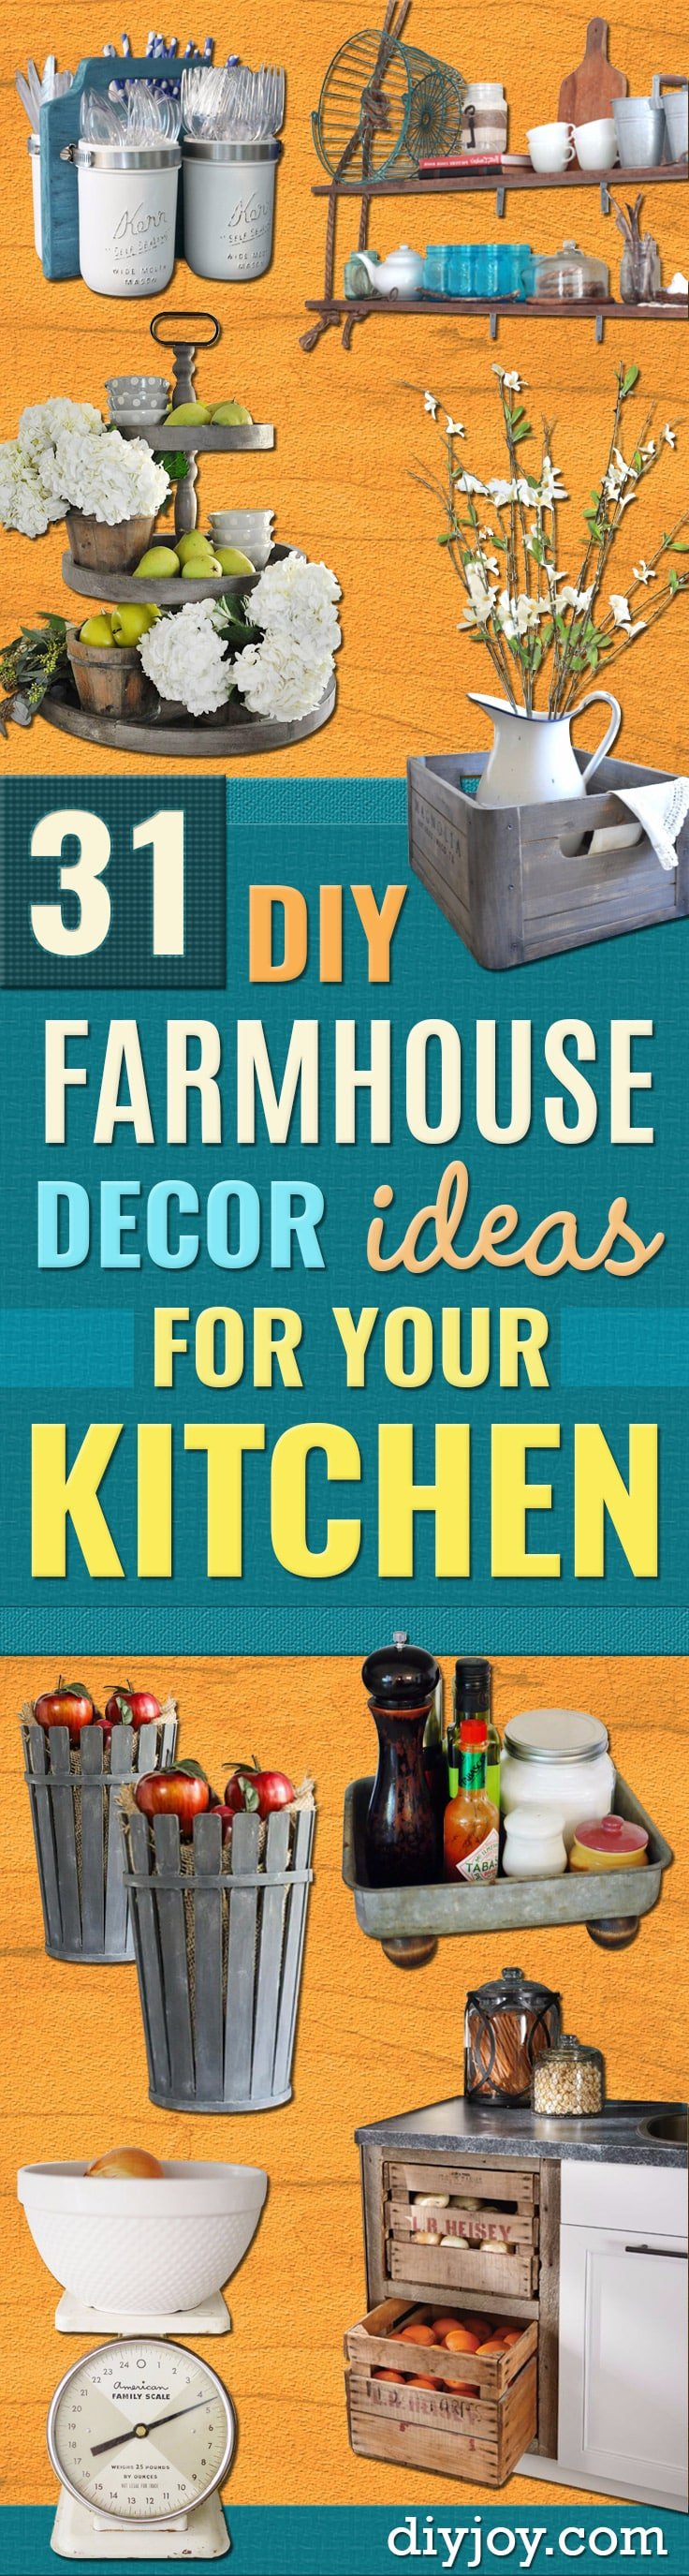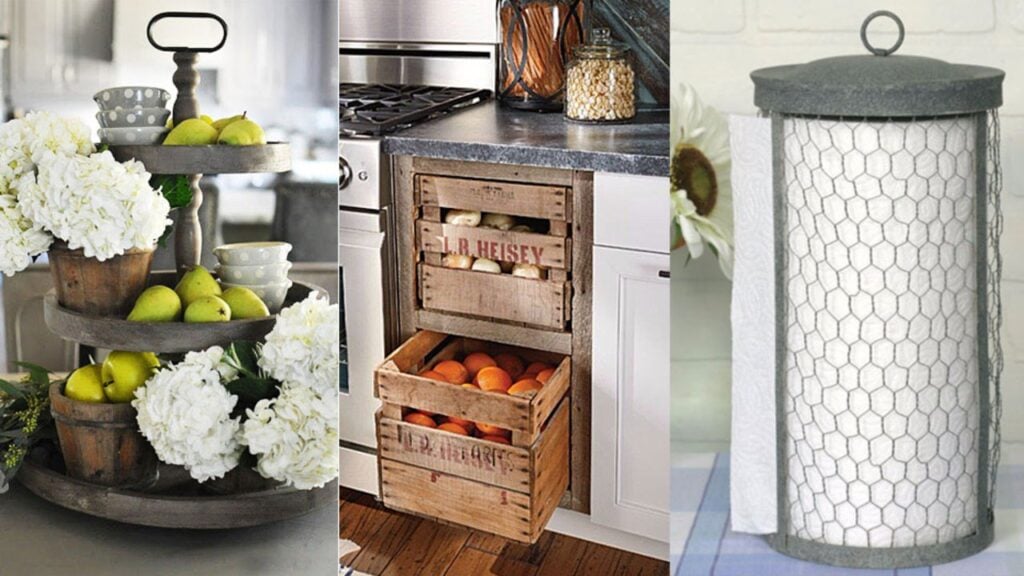
Is your kitchen craving a little more character than builder grade cabinets can give it? These 23 DIY farmhouse kitchen decor ideas bring in the warmth of an old country kitchen without a renovation budget. Farmhouse kitchens lean on natural wood, white paint, galvanized metal, mason jars and vintage finds, and most of those pieces are easy weekend builds. Some take five minutes, like a footed tray made from a garage sale pan, while open shelves and a glass rack are perfect for an afternoon with a drill. A few DIY JOY favorites with full videos are included too, including citrus print tea towels stamped with real lemons. Start with one wall or one countertop and watch the whole room change. Find even more rustic projects in these DIY farmhouse decor ideas.
1. Five Minute Farmhouse Footed Tray
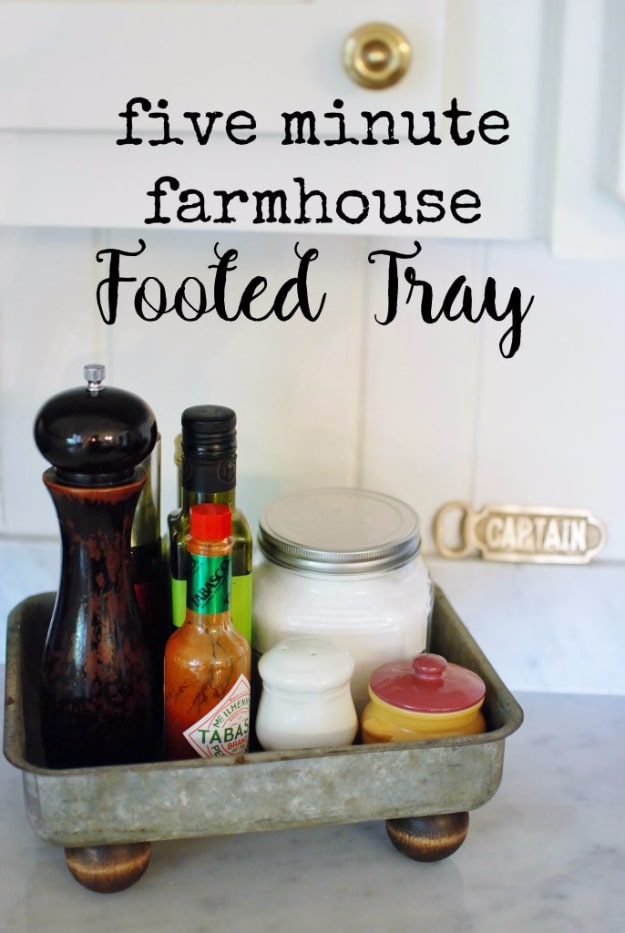
A five minute farmhouse footed tray starts with an old pan too dented and rusty to cook with, the kind found at garage sales. Hammer out the worst dents so bottles sit level. Metal can rust and mark the counter, so give it feet: stain four wooden ball knobs that come with a flat side, put a dab of strong craft glue on each and press them to the bottom. Let the glue dry completely. Set it beside the stove for oils, salt and spices and the clutter instantly looks tidier.
Get the full tutorial at Kim Pepper Blog.
2. Jeans Pocket Placemats
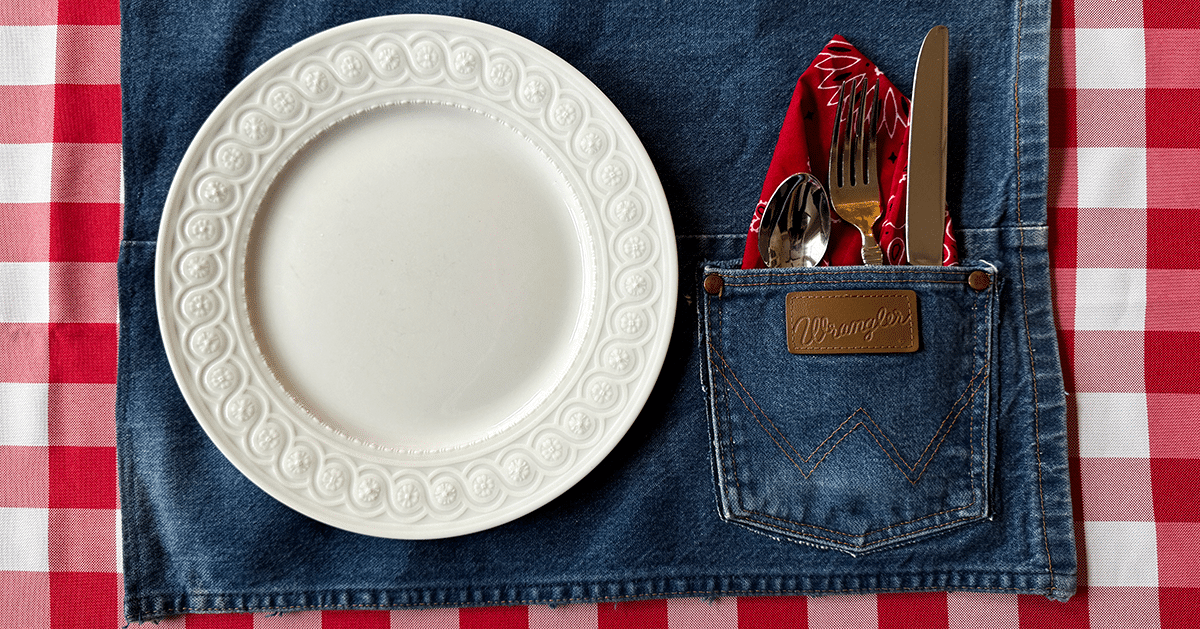
Jeans pocket placemats bring country charm to the kitchen table, with a built in spot for forks and a napkin. Use large non-stretch jeans, since each pair makes two mats. Cut a leg open along the outside seam, flatten it and trim a 14 by 19 inch rectangle. Cut a back pocket free close to its stitching. Fold each edge of the rectangle under a quarter inch, press with an iron and hold it with fabric glue and clips until dry. Glue the pocket to one side and let it set.
Get the full tutorial at DIY Joy.
3. Weighing Scale Farmhouse Kitchen Decor
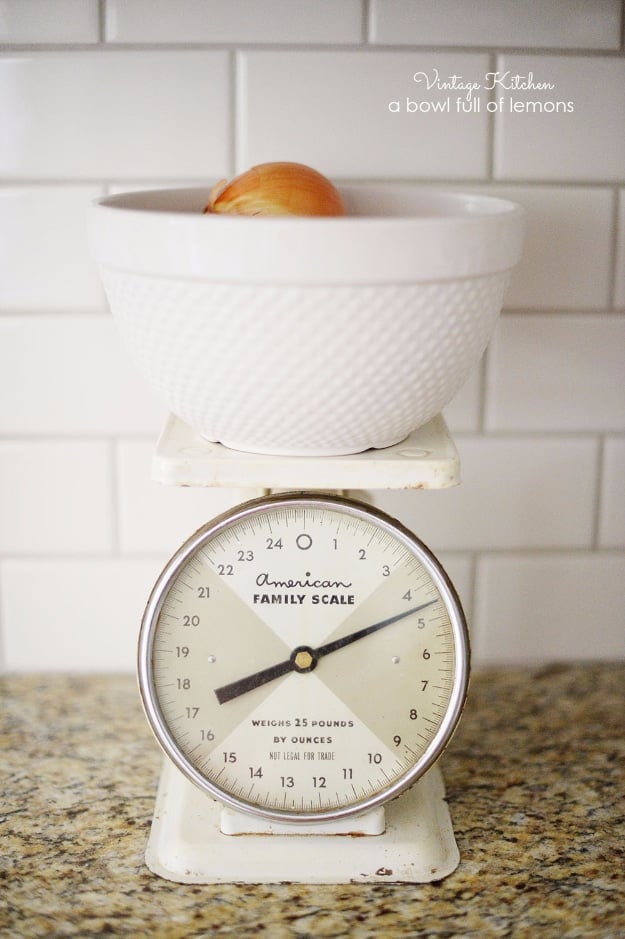
A vintage weighing scale is one of the easiest ways to add character to a builder grade kitchen. Look for old scales at flea markets, barn sales, antique malls and garage sales, along with milk glass pitchers, crocks and old signs. A crock makes a great utensil holder, and an old locker basket is perfect for cookbooks. Reproduction pieces from craft and home stores fill in the gaps. Pair them with simple updates like subway tile, vintage style light fixtures and a classic faucet, and set the scale right on the counter.
Get the full tutorial at A Bowl Full of Lemons.
4. Wooden Crate Centerpiece
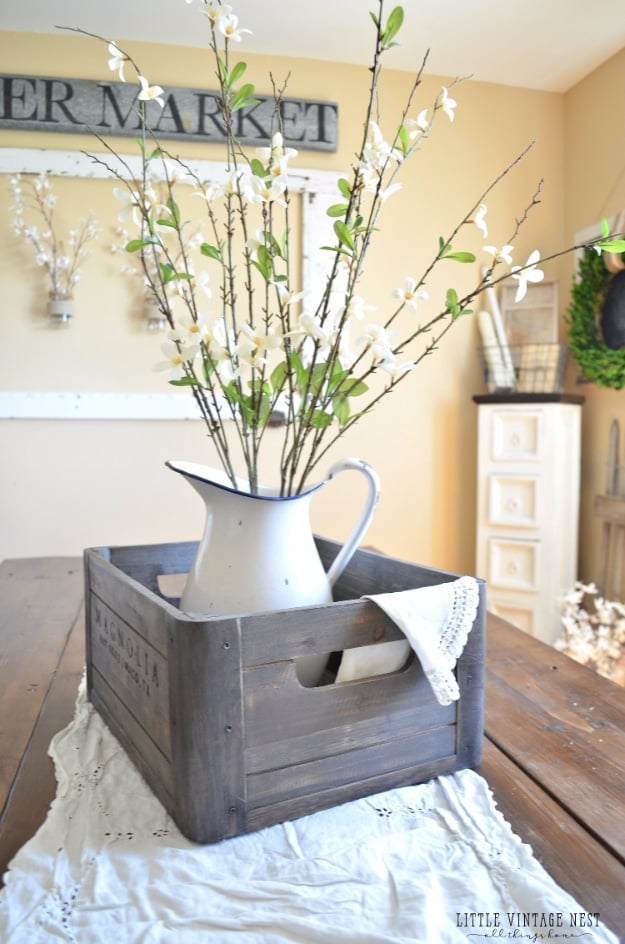
One wooden crate can be styled five ways around the house, starting with a simple table centerpiece of a white pitcher of spring branches set inside. On the counter it becomes good looking kitchen storage for everyday goodies. For a farmhouse vignette, flip a plastic storage container upside down inside the crate and drape it with burlap so a scale and vase sit up at eye level. It also works as a cubby beside a sofa. Neutral crates go with anything, so it can move from room to room.
Get the full tutorial at Sarah Joy.
5. DIY Farmhouse Message Board
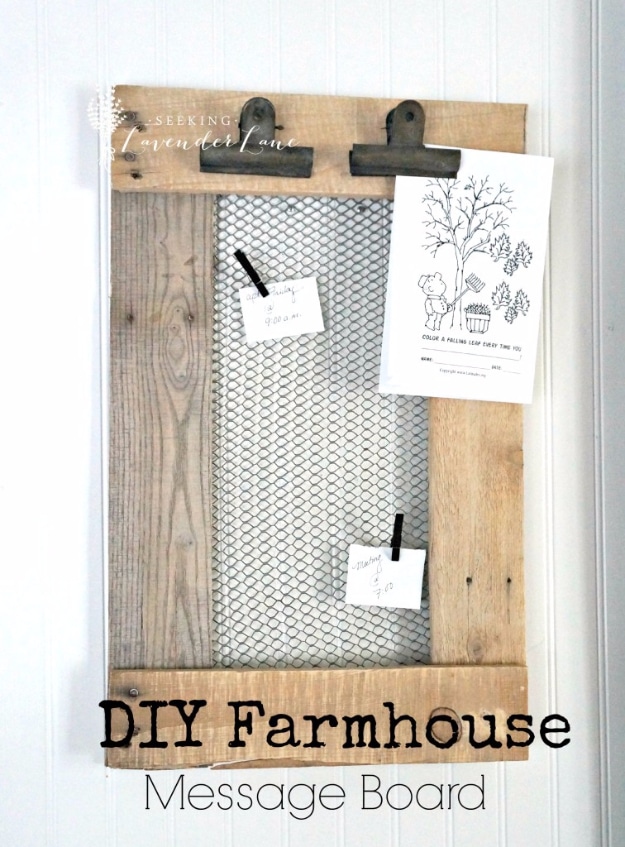
A farmhouse message board gives the kitchen a home for school papers, recipes and reminders. This one is made from leftover pallet wood, so the cost is close to nothing. Take the pallet apart, sand the boards smooth and glue them into a frame, because thin pallet slats can split if nailed. Staple a piece of chicken wire across the back. Glue two vintage style bulldog clips to the top rail with a fast drying glue. Hang it where the kitchen meets the dining room.
Get the full tutorial at Seeking Lavender Lane.
6. Pottery Barn Inspired Round Jute Place Mats
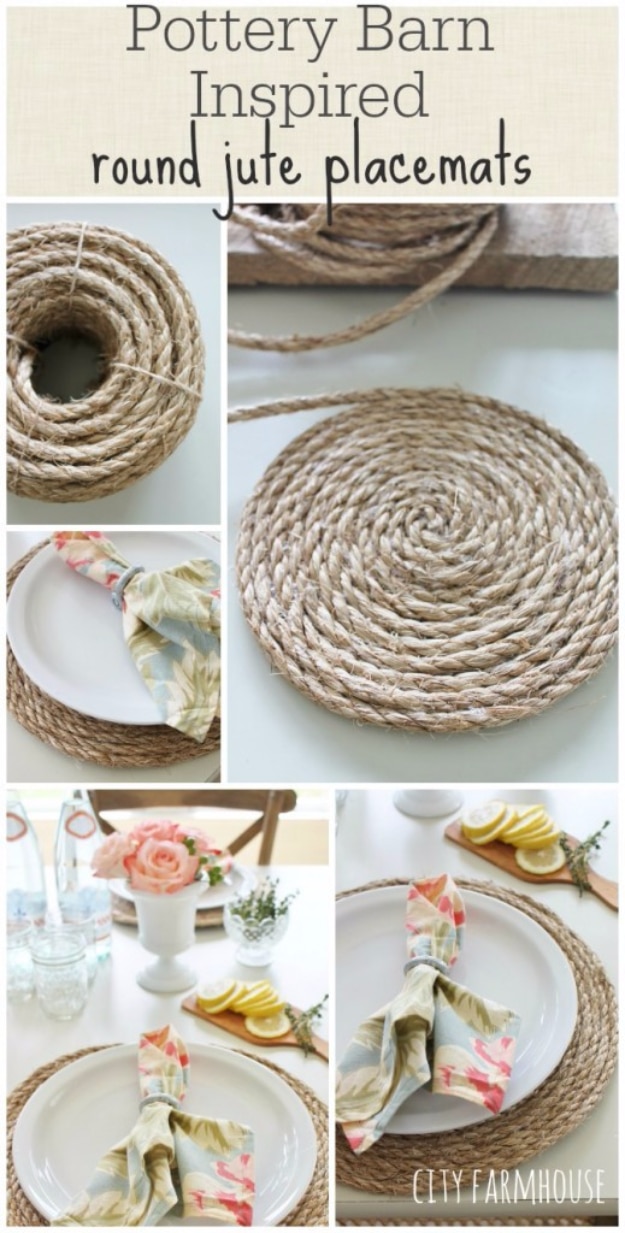
Pottery Barn inspired round jute place mats need only 3/8 inch jute and a hot glue gun. Start a tight coil in the center and keep winding outward, adding a line of glue and pressing each round firmly before gluing the next. About 34 feet of jute makes one mat roughly 13 inches across. Tuck and glue the tail on the underside. A set of six costs around $40, about half the catalog price. Pair them with white plates and bright cloth napkins for summer meals.
Get the full tutorial at City Farmhouse.
7. DIY Vintage Kitchen Sign
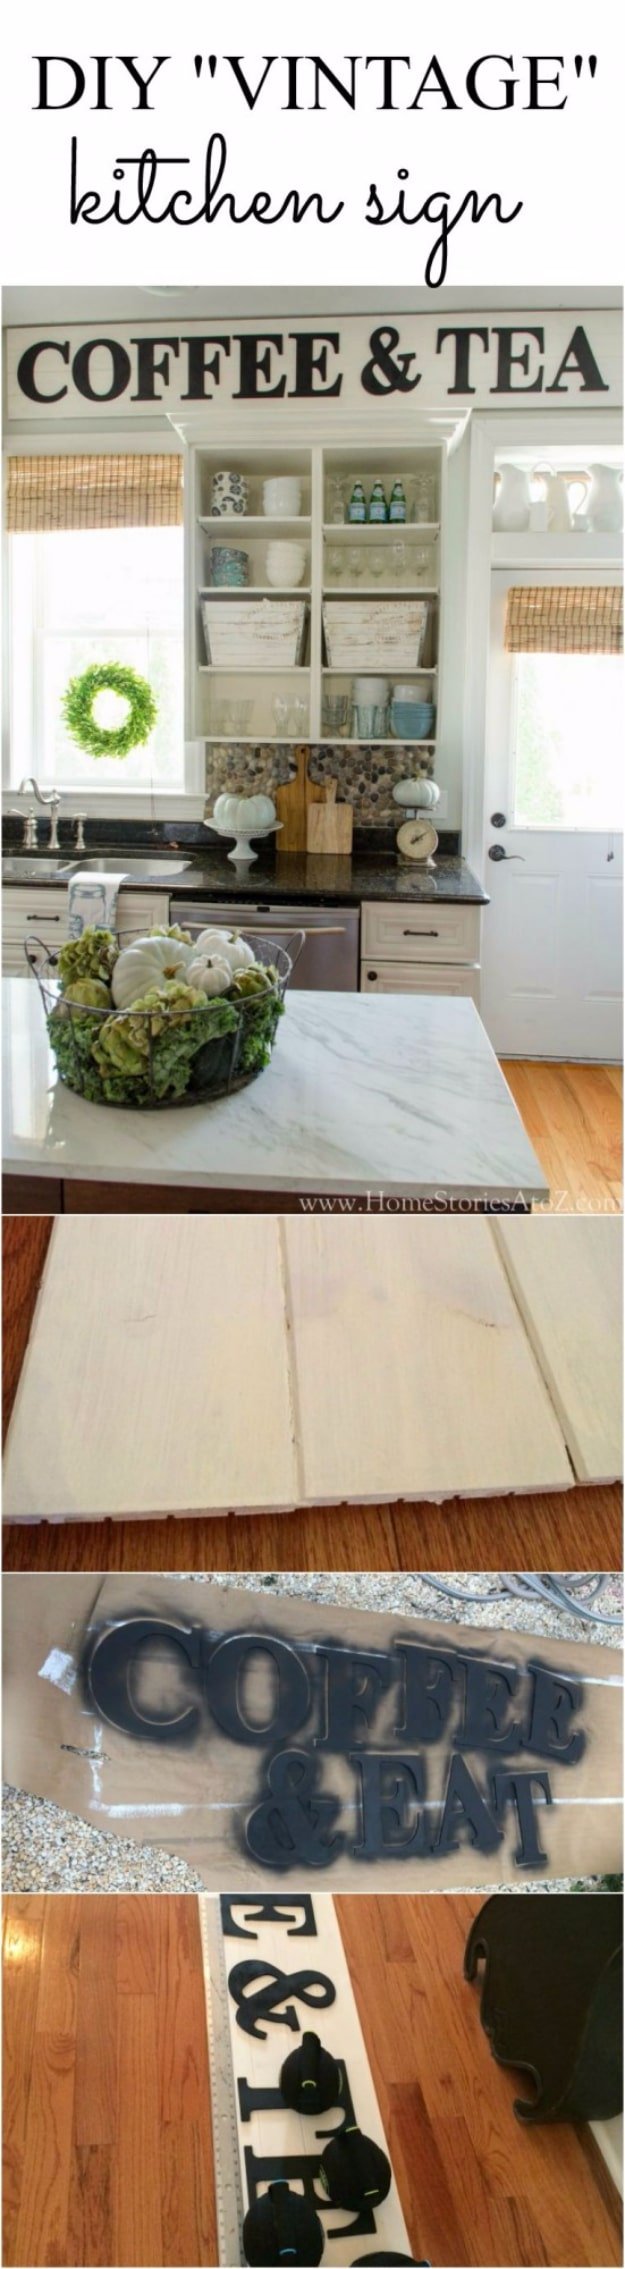
A DIY vintage kitchen sign can spell out anything, like COFFEE & TEA. Glue four V-groove panel boards together along their grooves and let them dry. No nails needed. Whitewash with watered down white chalk paint so the grain shows. Spray 9.5 inch craft letters with flat black, which looks less shiny and new. Glue them on, using a T-square to keep them straight and weights while they set. Glue small wood blocks to the back corners so the D-ring hangers have something to grip.
Get the full tutorial at Home Stories A to Z.
8. DIY Citrus Print Tea Towels
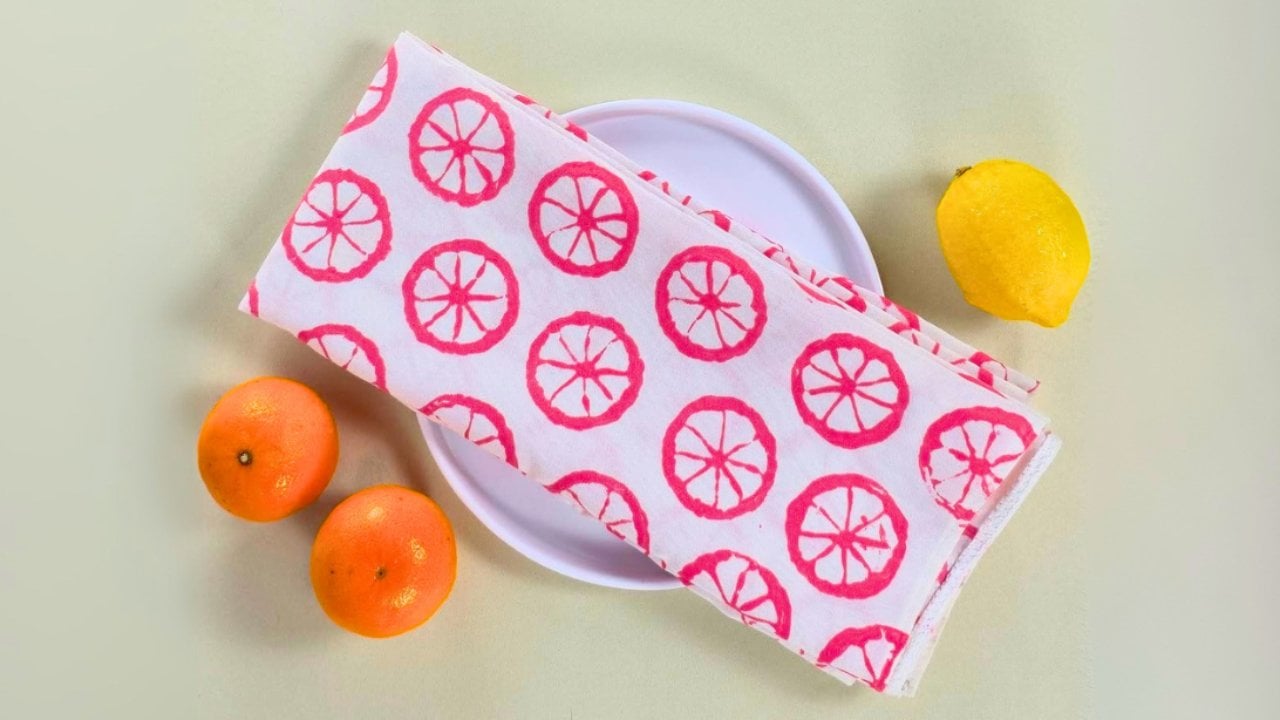
DIY citrus print tea towels are stamped with real fruit. Cut a lemon or orange in half and gently scoop out the pulp without breaking the membrane walls, which make the pattern. Pat it dry. Mix equal parts fabric paint and textile medium. Brush paint onto the membranes and rind edge, keeping it thin so prints stay crisp. Stamp rows across a plain towel, offsetting each row. Cut halves into wedges for smaller shapes and add a second color. Let it dry completely before using or washing.
Get the full tutorial at DIY Joy.
9. Upcycled Frame And Wreath
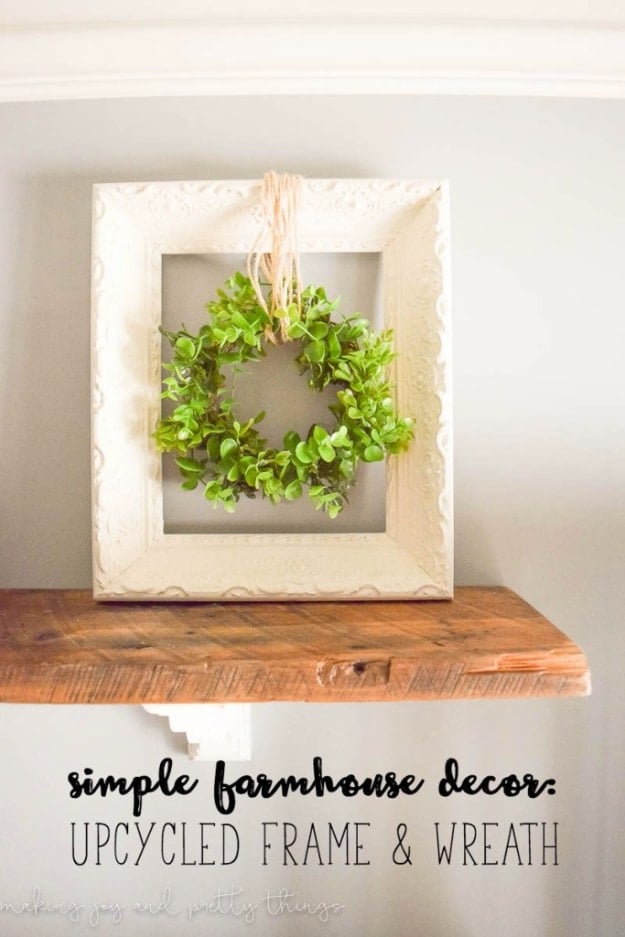
An upcycled frame and wreath is a sweet way to bring greenery onto open kitchen shelves without crowding them. Paint an old thrifted frame, glass and backing removed, with two coats of a soft linen white. Wind faux boxwood sprigs into a small 6 inch grapevine wreath, starting at the inside edge and gluing as you go. Wrap twine around the top of the frame and the wreath to hang it in the middle. Prop it against the backsplash on a reclaimed wood shelf, then switch the greenery seasonally.
Get the full tutorial at Making Joy and Pretty Things.
10. Barn Door Farmhouse Kitchen Decor
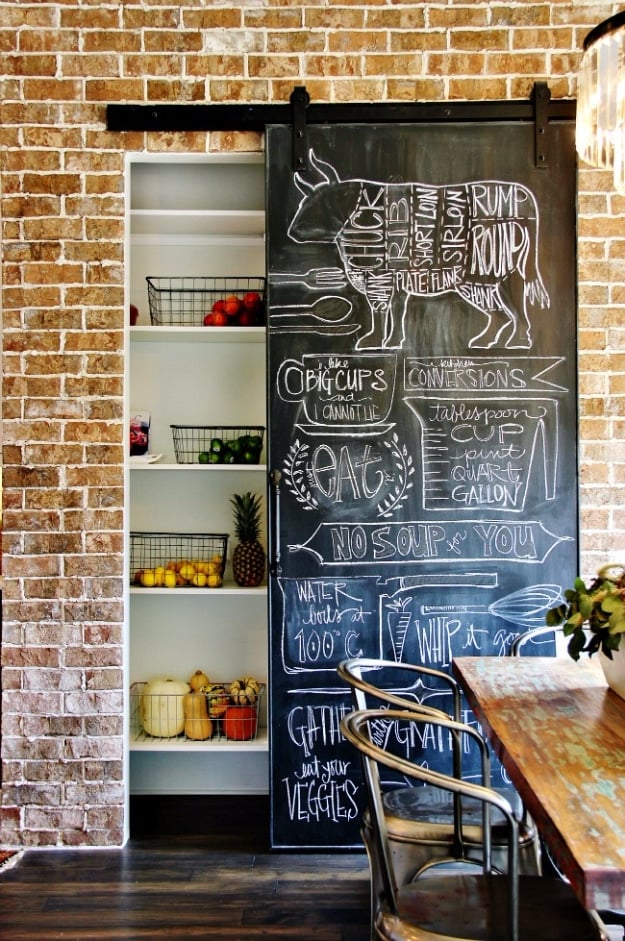
A chalkboard barn door works as kitchen decor and a pantry door at once. This one appeared in a designer show house tour full of barn wood rafters and hand painted details. A sliding door on a black rail frees up floor space a swinging door would need, and a chalkboard face invites a hand drawn butcher chart, measurement conversions or the week’s menu. Paint a flat slab door with chalkboard paint, season it with chalk, then draw. Pair it with open shelves and baskets inside.
Get the full tutorial at Thistlewood Farm.
11. DIY Three Tiered Tray
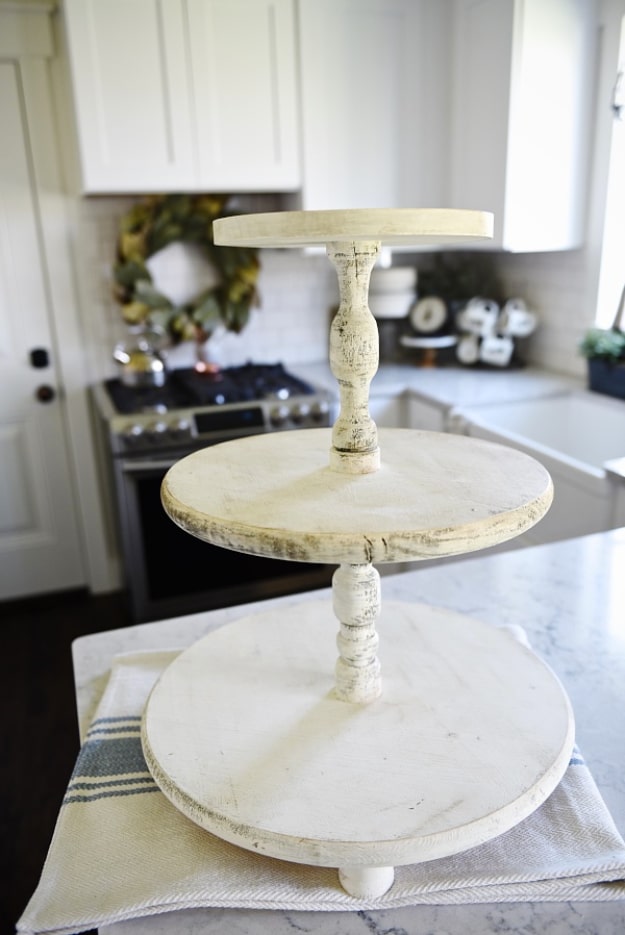
A DIY three tiered tray is a simple assembly job: two wooden candlesticks (one tall, one short), three wooden rounds in graduated sizes and three tiny candleholders or blocks for feet. Wood rounds come from hardware and craft stores, and ready made candlesticks work fine. Paint every part first. Screw the feet to the bottom of the largest round, then screw the tall candlestick between the bottom and middle rounds and the short one between the middle and top. Sand the edges lightly for a worn finish.
Get the full tutorial at Liz Marie Blog.
12. Vintage Inspired Farmhouse Decor
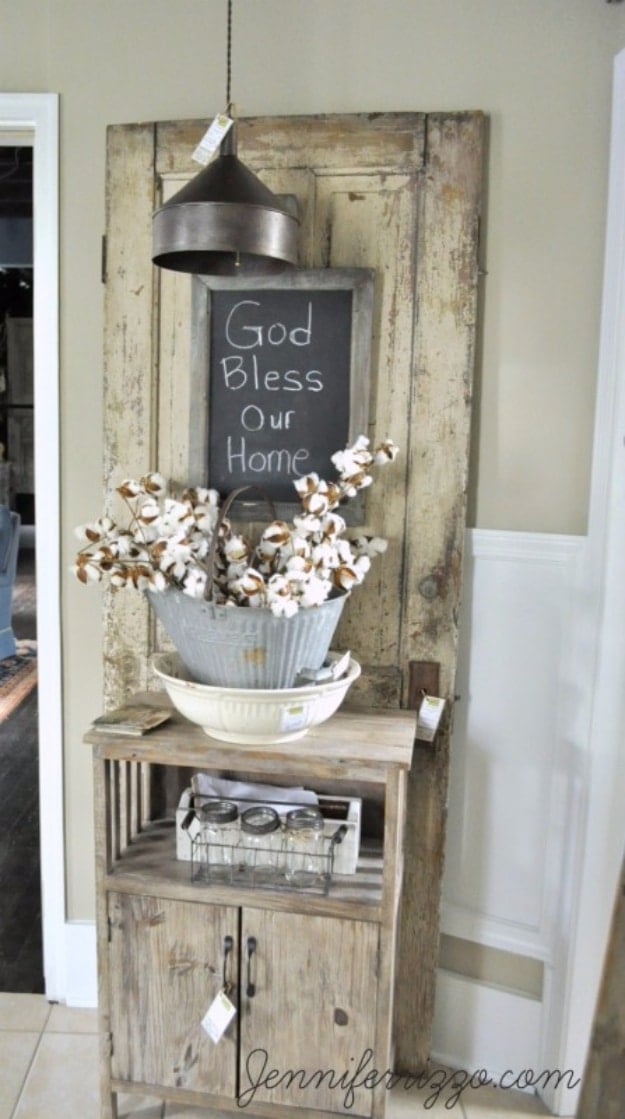
Vintage inspired farmhouse decor works best in little styled moments, like this corner from a designer show house kitchen. A salvaged chippy door leans against the wall with a framed chalkboard hung on it. A galvanized tub of cotton stems sits on a white bowl, and an old pantry cabinet holds jars below. Keep the palette neutral with linen, cotton and wood, then add farm animal accents. Real pies, cookies and bread on display make a styled kitchen feel lived in. Hang a funnel pendant to finish.
Get the full tutorial at Jennifer Rizzo.
13. DIY Farmhouse Style Nesting Boxes
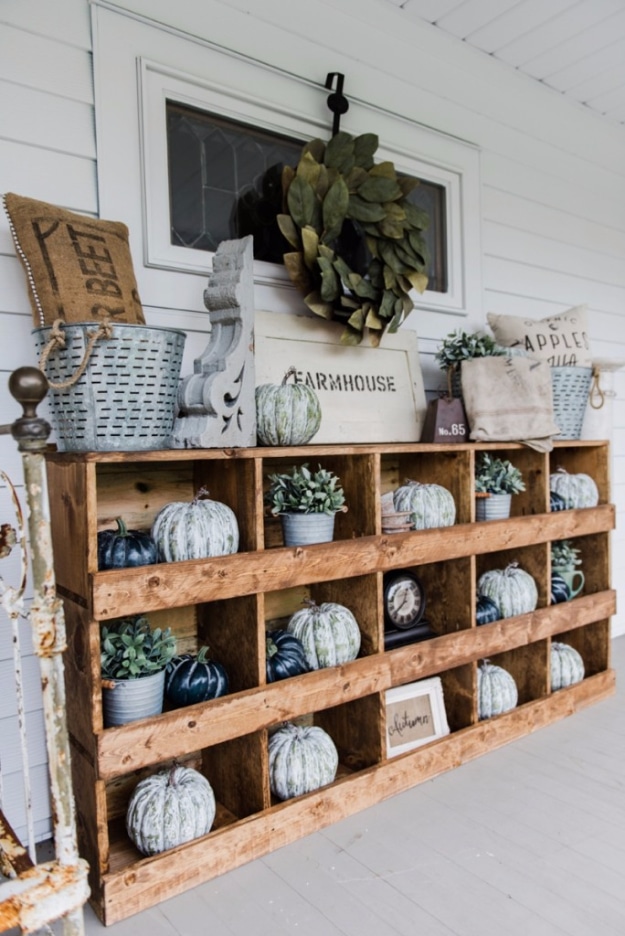
DIY farmhouse style nesting boxes copy the look of antique chicken coop nesting boxes, a long wooden unit divided into open cubbies. Build it to any size and finish it in any stain or paint, since the design is fully customizable. Use it on a porch or in a kitchen for seasonal decor, as a sofa table or entry table, a TV stand, or for storage in kids’ rooms and craft rooms. Style the cubbies with faux pumpkins, little plants, galvanized buckets and grain sack pillows.
Get the full tutorial at Liz Marie Blog.
14. Coffee Station Farmhouse Style
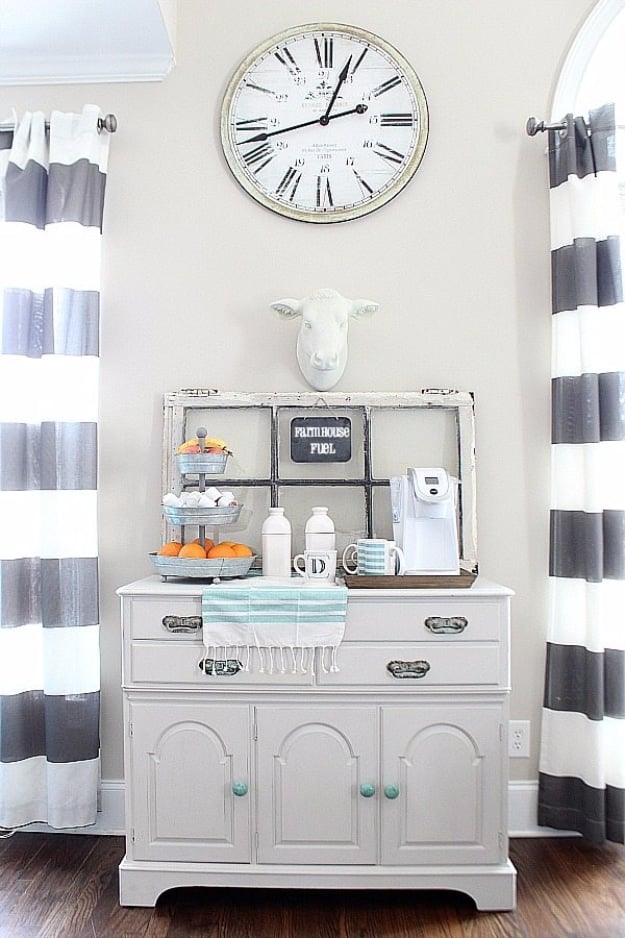
A farmhouse style coffee station can come together without buying anything. Clear the spot completely, then gather the essentials: coffee maker, mugs and pods. Shop the house for decor, like an old window to lean behind the bar and a three tiered galvanized stand for pods and treats. Refresh tired finds with paint. Here, a favorite cow head figure got two heavy coats of white paint and became the star of the station. Finish with a striped towel and a little chalkboard sign.
Get the full tutorial at Refresh Restyle.
15. DIY Farmhouse Hutch
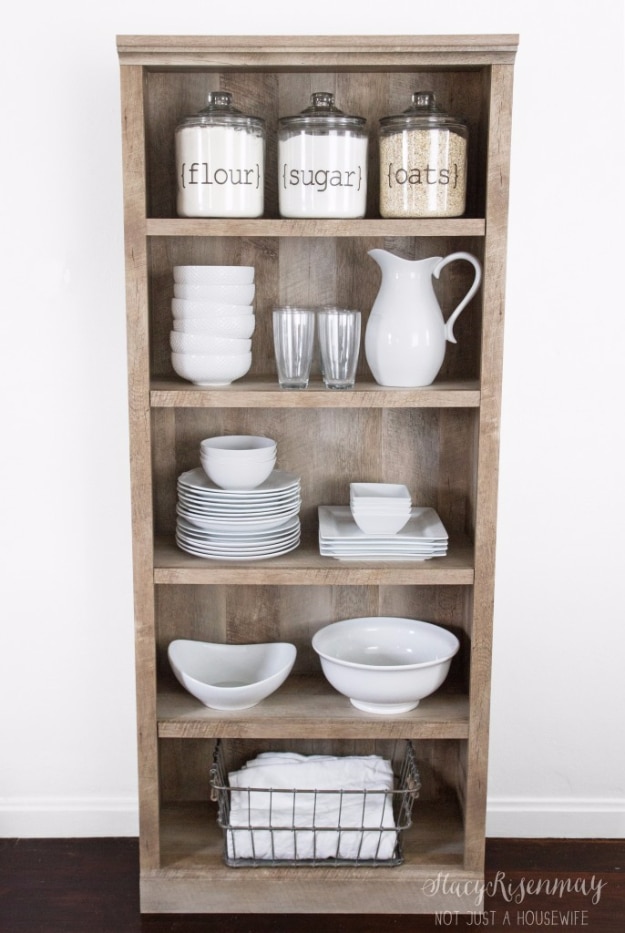
A DIY farmhouse hutch can be as simple as a barnwood look bookcase in a kitchen short on cabinets. Going vertical saves floor space in small homes and apartments. Line the top shelf with big glass canisters labeled flour, sugar and oats. Stack white bowls, plates and serving pieces on the middle shelves where they are easy to grab, and keep a pitcher out for display. Add wire baskets at the bottom to hide food packaging, tablecloths or dish towels. Look for a sturdy bookcase with a rustic finish.
Get the full tutorial at Stacy Risenmay.
16. Pottery Barn Inspired Glass Rack
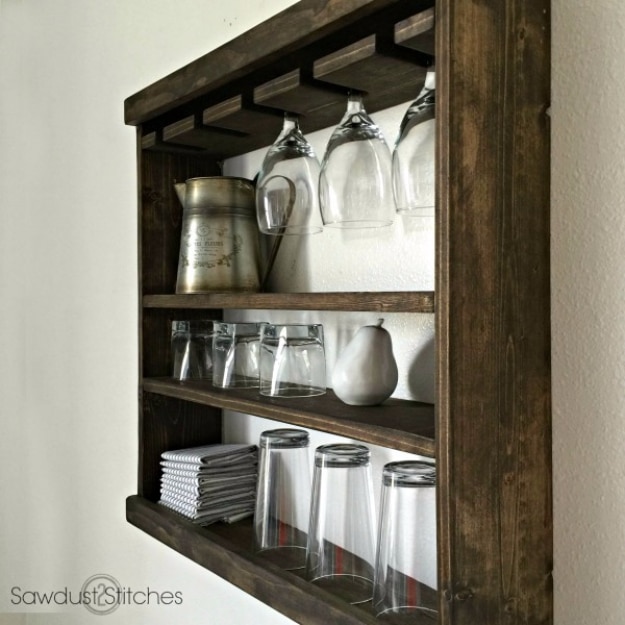
This Pottery Barn inspired glass rack frees up cupboard space by hanging glasses upside down and lining up tumblers on shelves. The cut list: five 1×6 boards at 24 inches for shelves, two 1×6 sides at 25 1/2 inches and 1×2 boards for the front rails and back support. Use a jigsaw to cut 1 inch wide, 3 inch deep slots into one shelf to hold stemware. Assemble the box with wood glue and 2 inch finishing nails, setting shelves 3, 12 and 18 inches from the top.
Get the full tutorial at Sawdust 2 Stitches.
17. Mason Jar Utensil Caddy
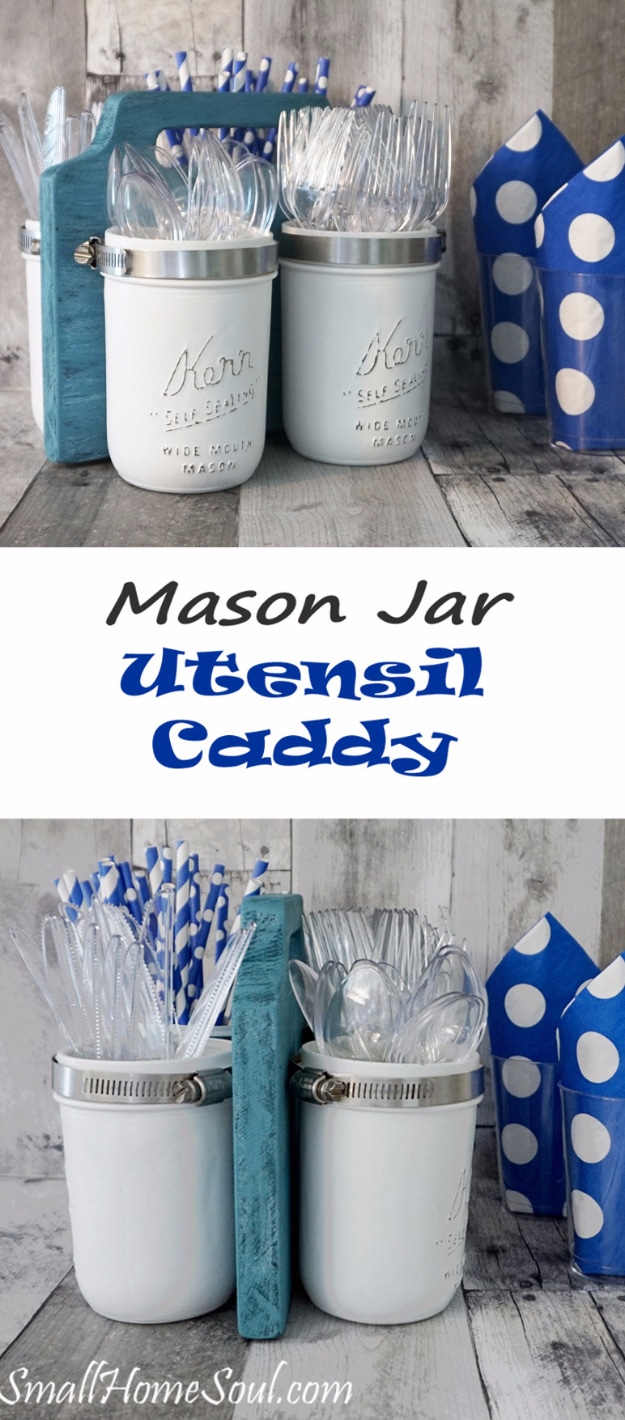
A mason jar utensil caddy carries forks, spoons and straws outside for barbecues. Spray paint two wide mouth jars white. Make a template from an old hanging file folder cut to 8 1/4 by 7 1/2 inches, fold it in half and cut a handle hole and scrolled edges. Trace it onto a scrap board, cut it with a jigsaw and sand with 60 then 120 grit. Paint it, dry brushing lighter colors over a dark base. Attach a hose clamp on each side about 4 1/4 inches up and tighten the jars in.
Get the full tutorial at Girl, Just DIY!.
18. Hardware Cloth Vase
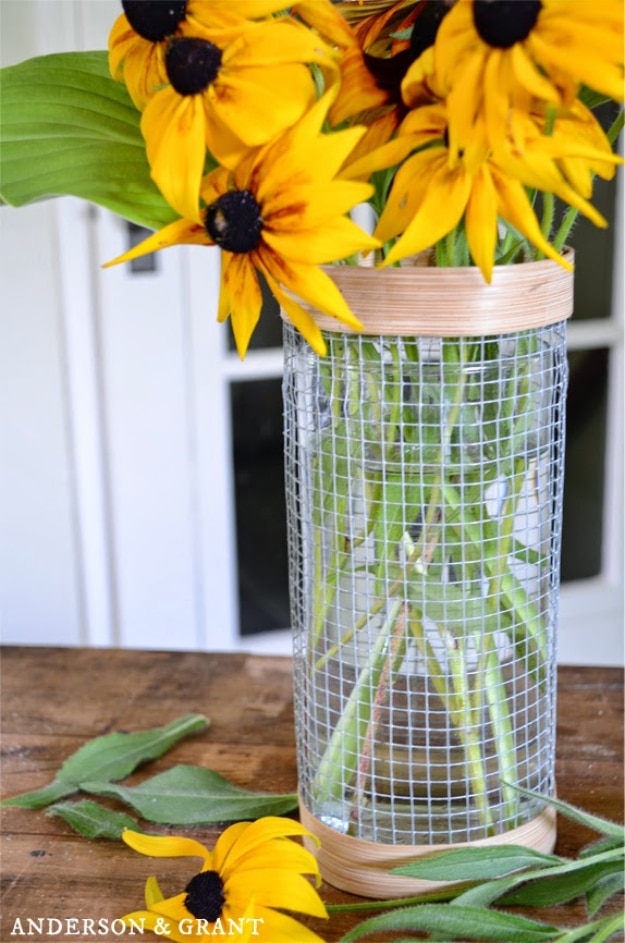
A hardware cloth vase wraps a plain glass vase from the dollar store in wire mesh and wood. Cut a rectangle of hardware cloth about 12 by 8 inches with wire cutters, slightly larger than the vase, leaving prongs on one side. Roll it into a tube, clip it with binder clips and fold the prongs around the smooth edge to close it. Soak flat basket reed in water for about an hour, then wrap strips around the top and bottom and clip until dry. Glue everything together.
Get the full tutorial at anderson + grant.
19. How to Make a Jute Rope Tray
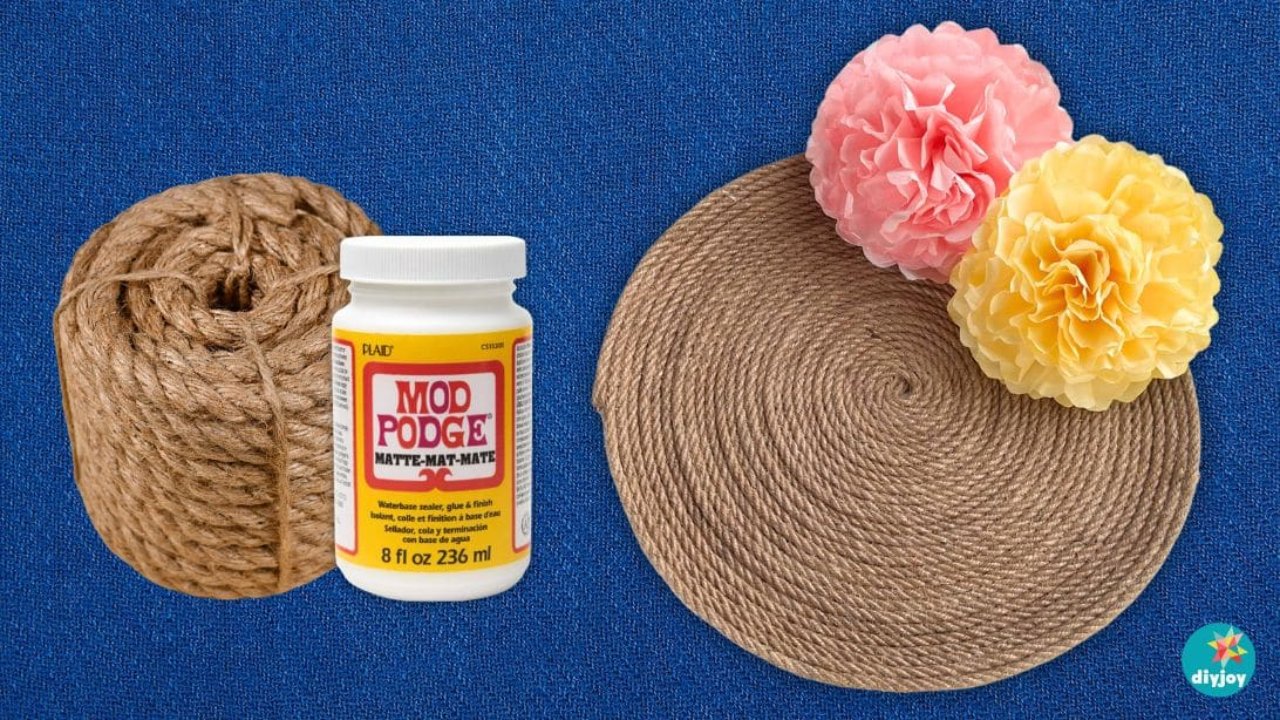
A jute rope tray adds texture to a kitchen counter and costs only a couple of dollars. Wrap a tray in cling wrap to use as a mold and brush it with plenty of Mod Podge. Coil the rope tightly from the center out, adding glue and pressing flat as you wind, with no gaps between rows. Cut and glue the end, then coat everything again. Let it dry somewhere airy, flip it with weights on top once the surface dries, and lift it off the plastic when firm.
Get the full tutorial at DIY Joy.
20. DIY Butcher Block Open Shelves
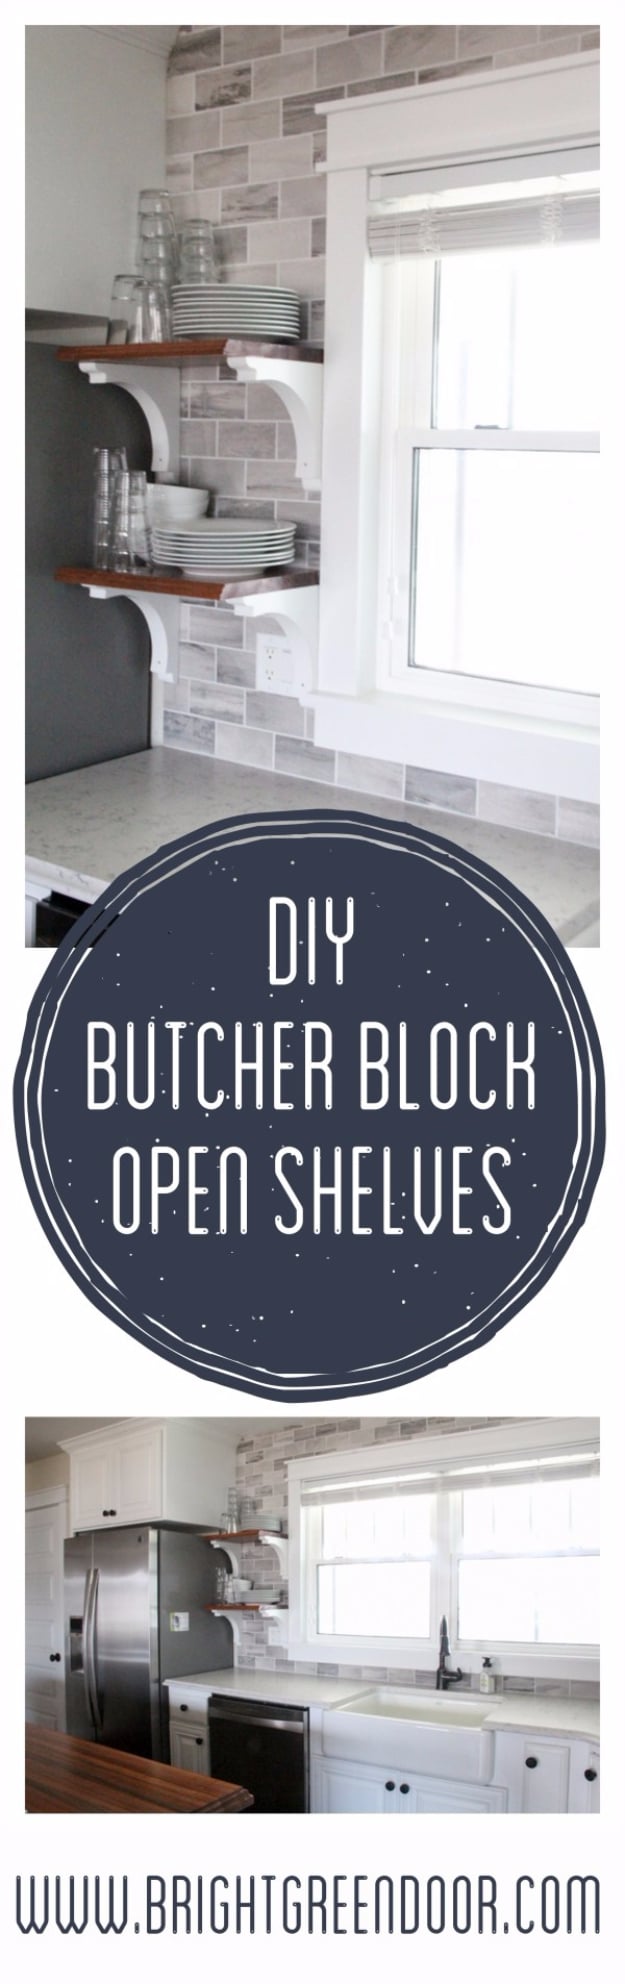
DIY butcher block open shelves replaced an upper cabinet when a bigger window went in over the sink. Two pieces of Sapele hardwood with an ogee edge were finished with a tung oil based sealer. The hardest part was drilling into the new tile backsplash: eight holes used up eight diamond bits, dipped in water every few seconds to stay cool. Once the brackets were in, each shelf was screwed down from both sides. Placed above the dishwasher, the everyday dishes go straight from rack to shelf.
Get the full tutorial at Bright Green Door.
21. DIY Rustic Wall Shelves
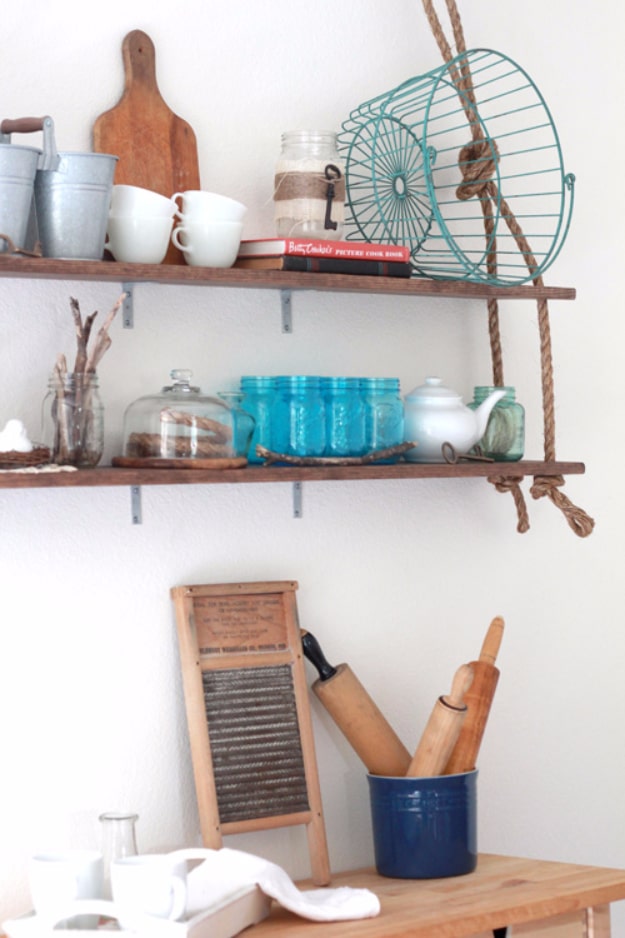
DIY rustic wall shelves hang from thick manila rope, which makes them a fun option for renters with blank walls. Cut a 1×8 board into two 4 foot shelves. Mark holes 1.5 inches from each end and drill them with a 3/4 inch paddle bit. Sand well, wipe off the dust and stain with Special Walnut. Thread 12 feet of 3/4 inch twisted manila rope through the holes, knotting under each shelf, and hang the loops from two hook screws. Brackets underneath keep the shelves level and steady.
Get the full tutorial at Making Home Base.
22. DIY Eat Sign
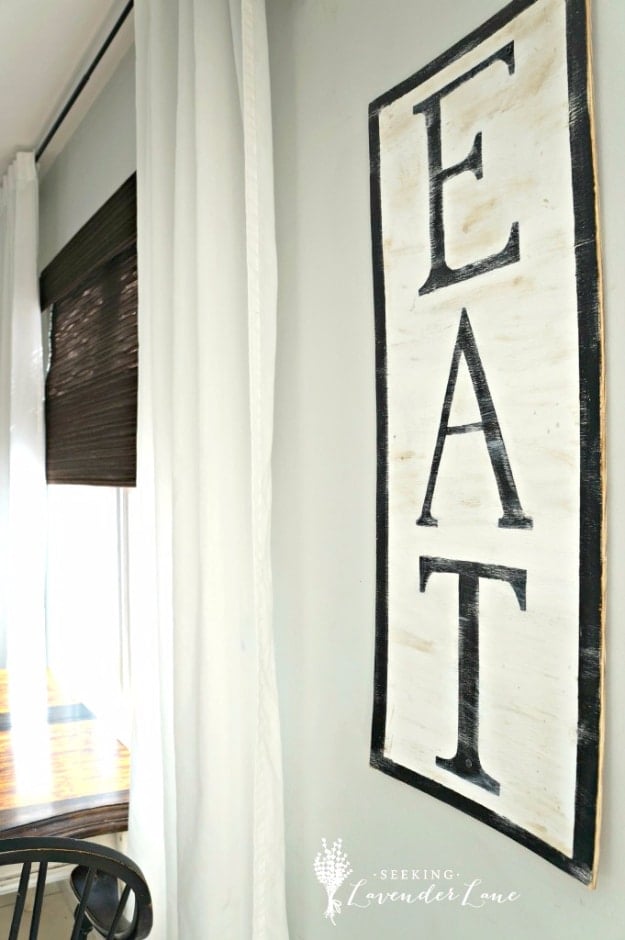
A DIY EAT sign fills a big empty kitchen wall for zero dollars using scrap wood from the garage. Find a flat, thin board and paint it white. Draw the letters on paper to make stencils, trace them on and paint them in black. Give the board a vintage feel with dark wax rubbed over the paint, and do not be afraid to bang it up a bit with a hammer and nails so it looks like a thrifted find. Hang it vertically between a window and the wall.
Get the full tutorial at Seeking Lavender Lane.
23. DIY Farmhouse Bench
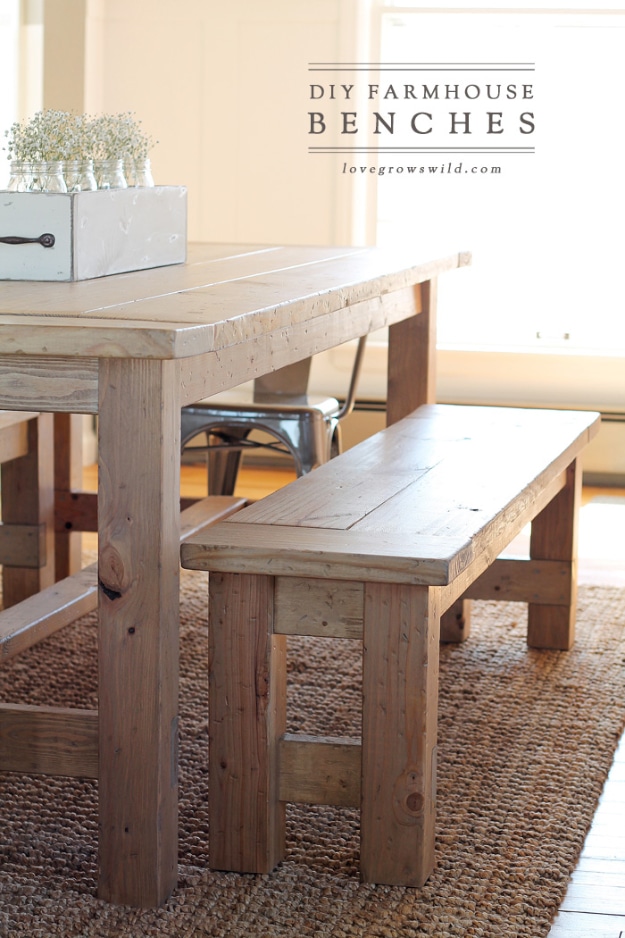
A DIY farmhouse bench saves space in a tight dining area, sliding right under the table between meals. The cut list: four 4×4 legs at 16 1/2 inches, two 2x8s at 49 1/2 inches and two at 14 1/2 inches for the top, plus 2×4 aprons and supports. Notch each leg by setting a circular saw to 1 1/2 inches deep, cutting 3 1/2 and 7 inches from the bottom, then every quarter inch between, and chiseling clean. Join everything with pocket holes and 2 inch screws.
Get the full tutorial at Love Grows Wild.